Customizer
Components
- Panel
- Section
- Setting
- Control
Panels
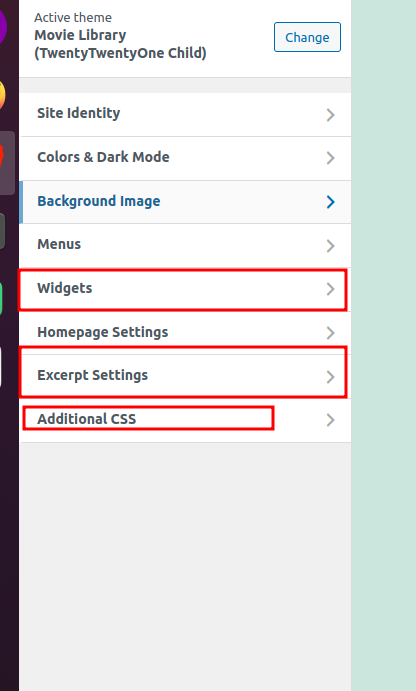
In customizer panel is the front section that you get panel -> this would contain the section and controls internally to allow you to interact with the settings.
Create a new panel
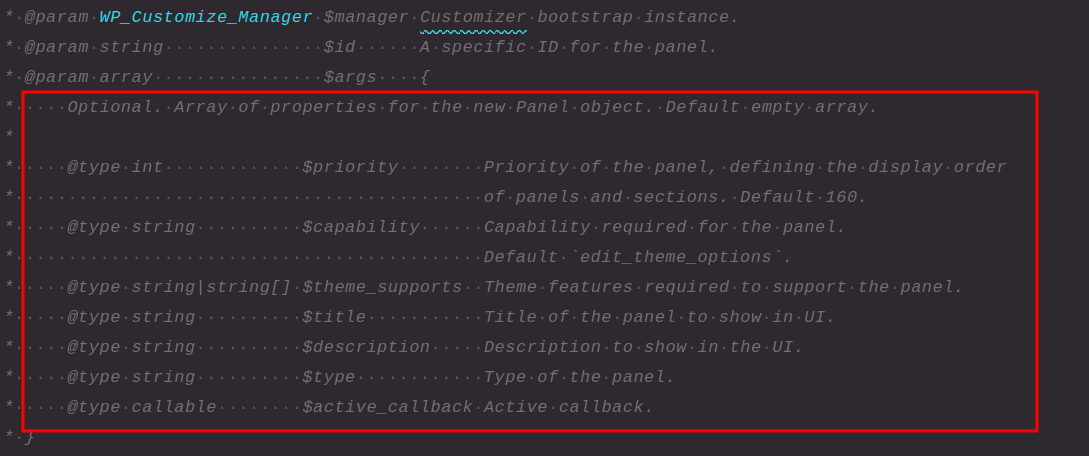
We can use the function add_panel of the WP_Customize_Manager class to create a new panel in the Customizer
$wp_customize->add_panel(
			'test_panel',
			array(
				'title'           => 'Test panel',
				'description'     => 'Test panel description,
				'active_callback' => array( $this, 'test_panel_callback' ),
			),
		);
The active_callback here would refer to a function which would return a boolean value to enable or disable this panel in the customizer. We can use this callback to show the panel only on some desired pages.
This also supports these optional arguments.
Sections
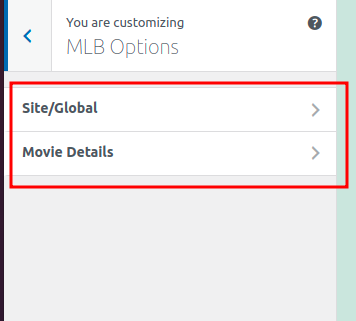
Inside the panels, what you see are known as sections, these are kind of sub-panels in case you want to group controls into sub categories and also add different options under panels, we can take use of sections.
Creating a section
We can use the function add_section of the WP_Customize_Manager class to create a new section in the Customizer
$wp_customize->add_section(
			'test_section',
			array(
				'panel'       => 'test_panel',
				'title'       => 'Test section',
				'description' => 'This is a test section',
			),
		);
Here we have to specify the ID of panel, so that the section knows to which panel it should hook itself into.
There are other optional arguments supported to modify the section layout and funcitonality.
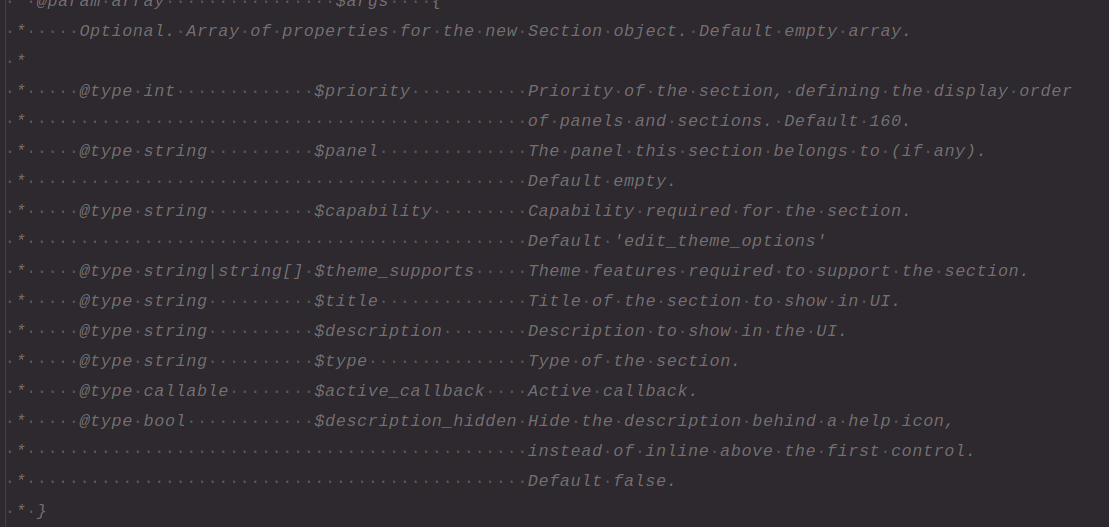
We can add the active_callback in the sections as well, it would do the same functionality here.
Settings
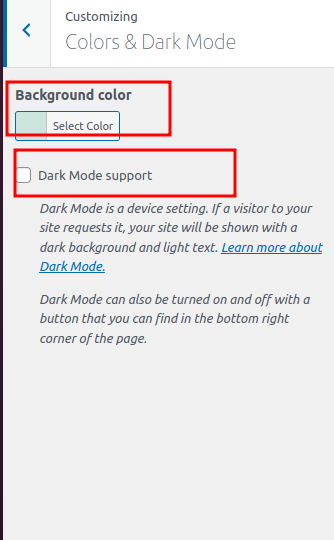
The settings are kind of values, or we can say the data that is stored in the database, about the customization. For example if we create a customizer to change the background colour of the site, the data must be stored somewhere, this is where the settings come into action.
They can be create with two types, -> theme_mod and option -> I will add the difference between the two on the end of the post.
Settings are not visually available on the customizer, they can be changed with the help of controls.
Register a setting
Settings needs to be registered first before using
$wp_customize->add_setting(
			'test_settings',
			array(
				'default'   => '#FFFFFF',
			)
		);
Registering a setting is pretty easy. In default we can provide the default value for this setting.
Setting also supports some optional arguments.
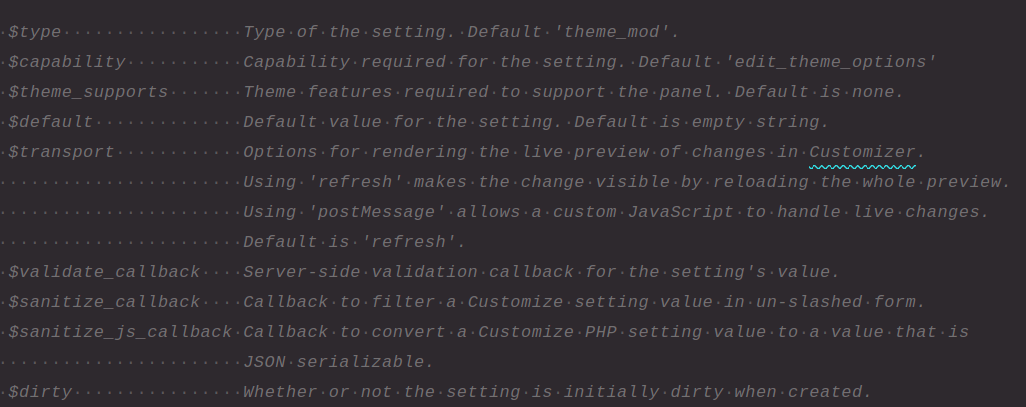
It supports callbacks for validation and sanitization of the settings.
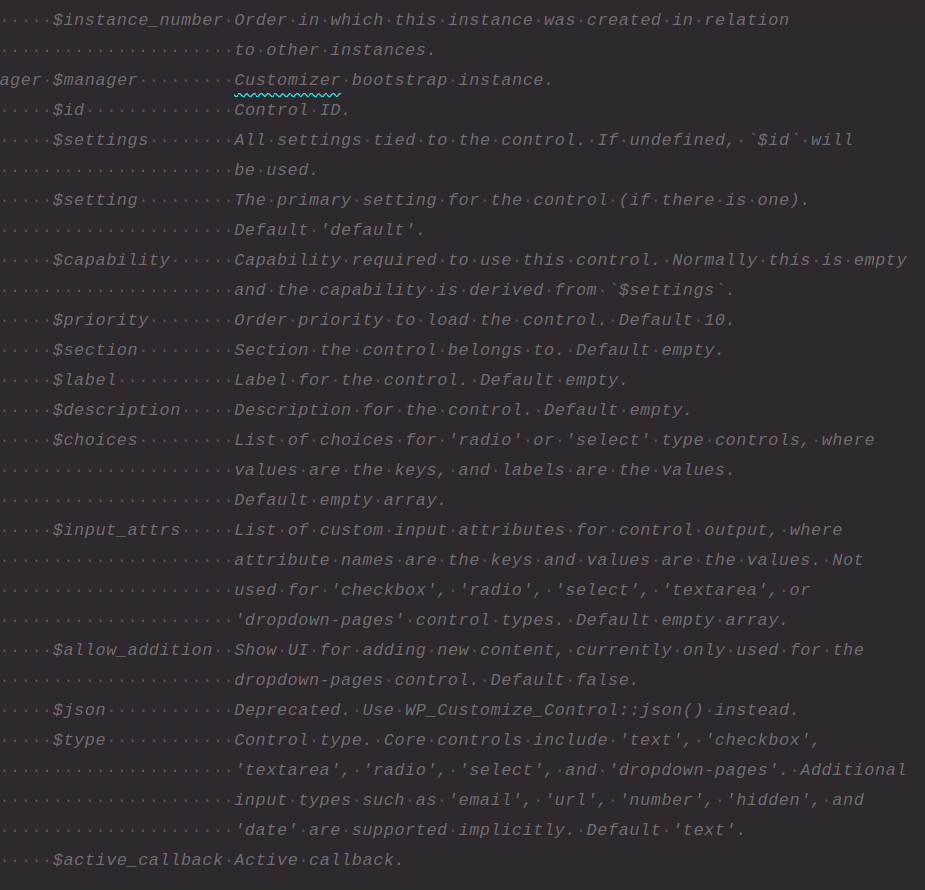
Controls
Controls are the front-end visual items in the customizer which helps us to interact with the settings and change their values.
Adding a control
We can use the function add_control of the WP_Customize_Manager class to create a new control in the Customizer
$wp_customize->add_control(
			'test_control',
			array(
				'section'     => 'test_section',
				'settings'    => array( 'test_settings' ),
				'label'       => 'Test setting',
				'description' => 'Test setting description',
			)
		);
We have to specify to which section the control must hook itself to.
The control also supports some optional parameters
Theme Mod vs Options
In theme mod the data is stored in the options table as -> theme_mods_{template_name} -> the data is stored as serialized array -> The value of this is still there even after switching themes back and forth.
In options the data is stored normally as option_name in options table -> now if other theme changes the data it would be the changed one when we re-enable the theme.